Welcome to Connie's Spot

The Above Picture is some of Connie's Spot© Crochet Patterns© All Patterns are Available at my Shop on ETSY Welcome to the Multiple Award-Winning Connie's Spot© & Connie Hughes Designs© Crocheting Blog! Check out Connie's New Endeavor Paper Crafting-Journals!! Now in our 11th Year We Want to Thank All Our Customers/Friends Who Have Helped Us Grow with Thousands of Pattern Sales/Downloads, and Over "ONE MILLION PAGE VIEWS" from All Over the World!!!

If you are new to Connie's Spot© make sure to take the time to follow Connie's Spot© Her Patterns are available at her shop on Etsy. Check out Connie's Spot© Blog Archive of 300+Posts!! That includes Free Crochet Patterns from Connie Hughes Designs© Free Recipes, New Paper Crafting-Journals, Decorating Tips, & Poetry!

As always Connie's Spot© is free of Pop-Ups and Invasive Ads...so take your time and explore her blog post archives its loaded with gems...most of all enjoy! Connie's Spot© will receive a small commission if you make a purchase after clicking on the Advertiser/Sponsor Links. This helps cover the cost for providing free patterns! Thanks for Visiting Connie's Spot© Blog!!

Connie's Spot© Crocheting & Connie Hughes Designs© Characters, Photo's, Designs & Patterns are All Copyright© Protected All Rights Reserved.

Shop Connies Spot© and Connie Hughes Designs© Crochet Patterns & Handmade Journals on Etsy!!

Shop Connies Spot© and Connie Hughes Designs© Crochet Patterns & Handmade Journals on Etsy!!
Shop Connie's Spot© and Connie Hughes Designs© Crochet Patterns & Handcrafted Journals on Etsy!! 995 Sales of Finished Products & Patterns Plus Over 100 5-Star Reviews!! To All Our Customers Thank You!!! Just Click on the Picture above to take you to my shop on Etsy!

Now Over ONE MILLION PAGE VIEWS!! To All Our Friends, Followers Customers & Visitors Welcome!!

Connie's Spot© Language Translator

"Ladies & Gentlemen Journal" Handcrafted by Connie Hughes Now available on my Etsy Shop!

"Ladies & Gentlemen Journal" Handcrafted by Connie Hughes Now available on my Etsy Shop!
"Ladies & Gentlemen Journal" Handcrafted by Connie Hughes, I have to say this is one of my favorites for sure. I really love this one, because it's a great size. Big enough to write on and small enough to carry inside a bag and take it with you. Now available on my Etsy Shop!

Connie's Spot© Awarded the Feed Spot Top 100 Crochet Blog Award!!

Connie's Spot© Awarded the Feed Spot Top 100 Crochet Blog Award!!
Connie's Spot© Awarded the Feed Spot Top 100 Crochet Blog Award!! I would like to personally congratulate you as your blog Connie's Spot© has been selected by our panelist as one of the Top 100 Crochet Blogs on the Web!!

Connie's Spot© Awarded Top 80 Crochet Blog Award!!

Connie's Spot© Awarded Top 80 Crochet Blog Award!!
"Top 80 Crochet Blogs" By AmsterdamDiary.com: Originality★★★★ Design★★★★★ Social Media★★★★★

Connie's Spot©

Connie's Spot©
Recipient of the One Lovely Blog Award...Thank You Crochet is the Way!!

Saturday, June 21, 2014

Free Agnes Inspired Doll Clothes Pattern©

"Free Agnes Inspired Doll Clothes Pattern©"
By Connie Hughes Designs©
These clothes will fit my Free Agnes Inspired Doll Pattern© 
Here is the link to the pattern below:
http://spotconnie.blogspot.com/search?q=agnes+doll+pattern
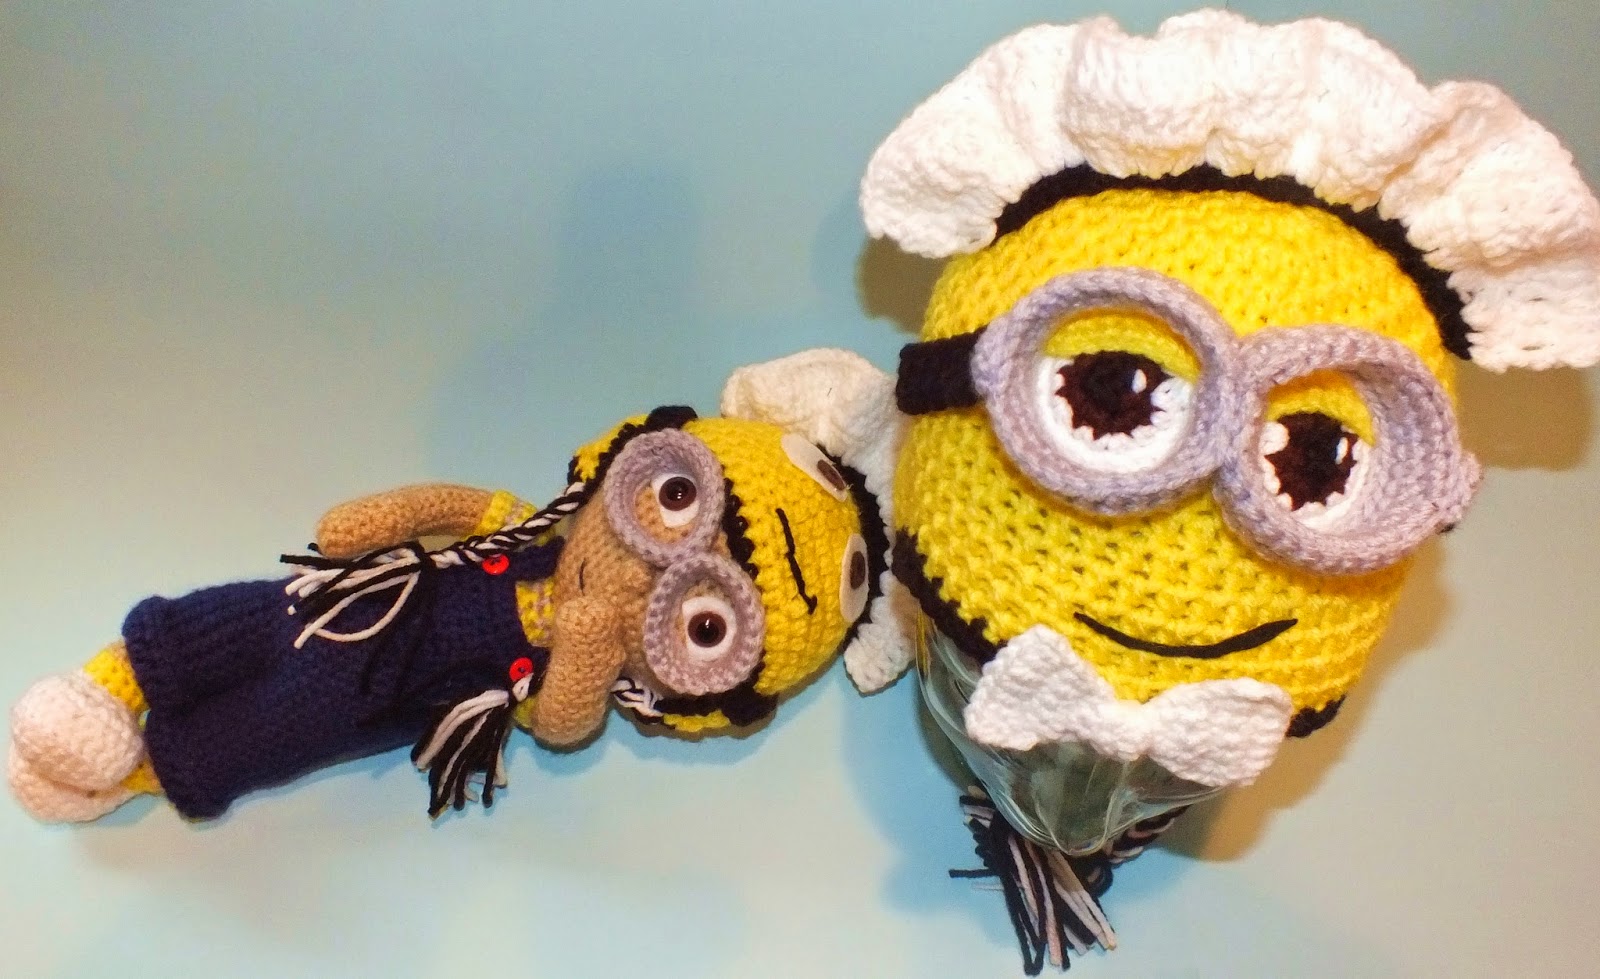
(The only pattern that is not here is the Minion French Maid Hat & goggles).

 Bright Yellow Rain Gear
To make the Raincoat: with Bright Yellow yarn an F Hook
Ch36 (I made my raincoat to fit a little snug)
Row 1. 1sc in 35sts, ch1 & turn.
Rows 2-23. repeat row 1
Row 24. 1sc in 8sts, ch7, sk 6sts, 1sc in the next st, ch1 & turn, wk 1sc in each ch7 st.
Continue to wk 1sc around sleeve, until you have about 14 rows and FO.
Attach yarn to the other side and repeat row 24 and FO.
Attach yarn on one side of the raincoat.
Row 25. wk 1sc in each st across including the top sts of the sleeves.
Row 26. 1sc in each st across, ch2 & turn.
Row 27. wk 1dc in the FLO in each st across, ch2 & turn.
Row 28. 1dc in each st across and FO. Sew some cute buttons on.
To make the button holes:
Make a ch long enough to go around the buttons and sew the loops on the other
side of coat.

To make the Pockets: with Bright Yellow (make 2)
Ch7
Row 1. 1sc in 6, ch1 & turn.
Rows 2-6. repeat row 1
Row 7. 1hdc in the FLO in each st, ch1 & turn.
Row 8. 1sc in each st and FO.
Sew one pocket on each side of coat.
To make the Rain Hat: with Bright Yellow
Ch2
Row 1. wk 6sc in the 2nd st from the hook.
Row 2. 2sc in each st around.
Row 3. 1sc, 2sc in the next st-18sts.
Row 4. 1sc in 2, 2sc in the next st-24sts.
Row 5. 1sc in 3, 2sc in the next st-30sts.
Row 6. 1sc in 4, 2sc in the next st-36sts.
Row 7. 1sc in 5, 2sc in the next st-42sts.
Row 8. 1sc in 6, 2sc in the next st-48sts.
Row 9. 1sc in 7, 2sc in the next st-54sts.
Rows 10-14.  1sc in each st around.
Row 15. ch1, wk 1hdc in 3sts, 2hdc in the next st, join and ch2.
Row 16. wk 1dc in each st around and FO.
To make the ties on the hat:
Attach yarn to each side of hat and ch40 FO.

To make the Rain Boots: with a G Hook (make 2)
Ch2
Row 1. wk 6sc in the 2nd st from the hook.
Row 2. 2sc in each st-12sts.
Row 3. 1sc, 2sc in the next st-18sts.
Row 4. 1sc in 2, 2sc in the next st-24sts.
Row 5. 1sc in the FLO in each st-24sts.
Row 6. 1sc in 6sts, 1hdc in 12, 1sc in 6sts.
Row 7. 1sc in 6, dec1 6x, 1sc in 6sts.
Row 8. 1sc in 6, dec1 3x, 1sc in 6sts.

Row 9. 1sc in 5sts, 1sc in the FLO in 5sts, 1sc in 5sts.
Row 10. 1sc in each st, repeat row 10 about 4 or 5 times and FO.
 
Bubble Gum Jumper 
With Lion Brand Yarn in Bubble Gum and F Hook
Ch43 Join with a sl st, ch1
Row 1. 1sc in each st-42sts.
Rows 2-21. repeat row 1 and FO.
To make the front bib:
Attach yarn evenly in the front of outfit
Row 22. wk 1sc in 14sts, ch1 & turn.
Row 23. dec1, 1sc in 10sts, dec1, ch1 & turn-12sts.
Row 24. dec1, 1sc in 8sts, dec1, ch1 & turn.
Rows 25-26. 1sc in each st, ch1 & turn.
Row 27. 1sc in each st and FO.
Sew on 2 tiny buttons on each side to the bib.
To make the shoulder straps: with a D Hook
On each side of the bib, count out 5sts, attach yarn in the 6th st.
Wk 1sc in 3sts, ch1 & turn, repeat until the straps reach over her shoulders.
Make (the button holes) a ch long enough to fit the buttons in, sl st and FO.
To make the side pocket in the front:
Ch8
Row 1. 1sc in 7sts, ch1 & turn.
Rows 2-6. repeat row 1 and FO.
Sew on the front of jumper.

To make the white top under the Jumper: With A White Sparkle Yarn by Red Heart.
Ch35 Join and ch1
Row 1. 1sc in 34sts, do not join.
Rows 2-7. repeat row 1, at the end of row 7 ch1 & turn.
Row 8. 1sc in 34sts, ch1 & turn.
Rows 9-12. repeat row 8.
Row 13. dec1, 1sc in 30sts, dec1, ch1 & turn-32sts.
Row 14. 1sc in 32sts, ch1 & turn.
Row 15. 1sc in 5sts, ch6, sk 4sts, 1sc in the next st, turn slightly and wk 1sc in the 4 skipped sts and the next st, wk 1sc in each ch6, continue working around those sts until the sleeve has about 5 rows and FO.
Row 16. attach yarn to the other side and repeat row 15 FO.
Row 17. attach yarn to one end and wk 1sc in each st, including the sts on the top part of the sleeves, ch1 & turn.
Row 18. 1sc in each st, ch1 & turn.
Row 19.1sc in the FLO in each st, ch2 & turn.
Row 20. 1dc in 16sts, 1sl st in the next st in the front middle of the top, wk 1dc in the rest of the sts, ch1 and wk 1sc in 2 or 3sts down one side of top. Make a ch long enough to fit over a button sl st. Sew the button onto the other side.
To make the blond wig: with Bright Yellow yarn
Ch2
Row 1. wk 6sc in the 2nd st from hook.
Row 2. 2sc in each st-12sts.
Row 3. 1sc, 2sc in the next st-18sts.
Row 4. 1sc in 2, 2sc in the next st-24sts.
Row 5. 1sc in 3sts, 2sc in the next st-30sts.
Row 6. 1sc in 4sts, 2sc in the next st-36sts.
Row 7. 1sc in 5sts, 2sc in the next st-42sts.
Row 8. 1sc in 6sts, 2sc in the next st-48sts.
Depending on how much you stuff the head you can stop here or keep going. It's best to try it on. So you'll have a perfect fit. Also don't stuff the head to much.
Row 9. 1sc in 7sts, 2sc in the next st-54sts.
Rows 10-15. 1sc in each st around and FO.

To make the curls: with Bright Yellow yarn (make clusters of 4)
Row 1. Ch25, wk 2sc, 3sc, 3sc, 2sc, repeat this for each curl, wk 1sl st.
You can add more or less sts if you like. This is just how I made them.
Row 2. Ch36,  repeat row 1
Row 3.  Ch28, repeat row 1
Row 4.  Ch18, repeat row 1 and FO. You can make as many curls as you would like. I made 4, 2 on each side.
To make the Mary Jane's: with Black yarn and a G Hook (make 2)
Ch2
Row 1. wk 6sc in the 2nd st from the hook.
Row 2. 2sc in each st-12sts.
Row 3. 1sc, 2sc in the next st-18sts.
Row 4. 1sc in 2, 2sc in the next st-24sts.
Row 5. 1hdc in FLO in 12sts, 1hdc under both loops in 12sts.
Row 6. 1hdc in 24sts.
Row 7. 1hdc in 12, 1sc in 12sts.
Row 8. dec1sc 6x, 1sc in 12sts and FO. (make the straps after you make the socks).
Now to make the socks: with White yarn a F Hook
Attach the white yarn with a sl st
Row 1.  wk 1sc in the FLO all the way around the shoe, join & Ch1.
Rows 2-3. 1sc in each st around, join & ch1.
Row 4. wk 1hdc in the FLO in each st, join & ch1.
Row 5. wk 1hdc in each st and FO.
To make the straps: with Black yarn
Attach yarn on the inside part of shoe and ch19, wk 1sl st in the 5th ch st from the hook and FO.
Repeat this on the other shoe and sew the buttons in place.
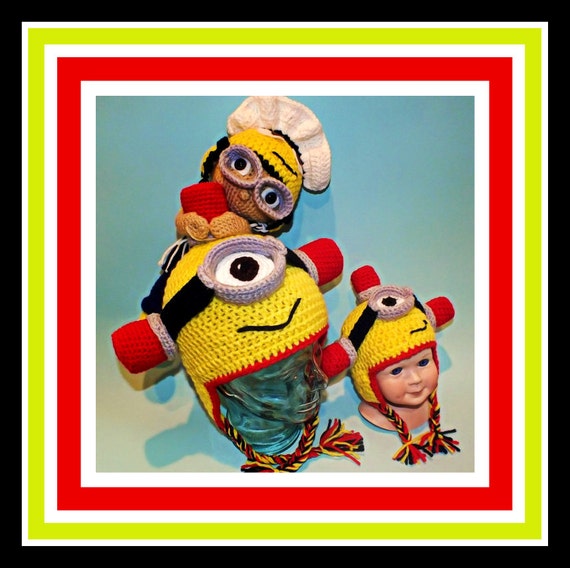
The Completed Dolls are available at Connie's Spot© Shop here's the link:

Tuesday, June 17, 2014

Crochet Wedding Dolls Colby & Mindy Wellington Mouse©

Here's the latest by Connie Hughes Designs©
Mindy has met the perfect mouse, so it's time to say
" I Do"
Meet Colby & Mindy Wellington Mouse©
They're all dressed up in their
Sunday best!
This couple was made and dressed in a simple fashion...
But still has all the Wedding Charm!
A simple veil with little roses worn on the head.
And a strand of pearls adorn Mindy's dress!
 
 Colby is wearing a pink rose
boutonniere and vest.
with white cuffs
and finished it off with a black top hat!
Stay Tuned!!
:-)
Connie
 Thanks for Supporting Connie's Spot© Sponsors!!


Thursday, June 12, 2014

Minion Inspired Siren & French Maid Crochet Hat Patterns©

"Sound The Alarm"
Here's The Minion Inspied Siren & French Maid Hat Patterns©
by Connie Hughes Designs©
 Are Here!
This French Maid hat is toddler size...and
little girl's will love it because they can wear the goggles!!
Agnes loves to wear her goggles...
and yes there is even a hat pattern for Agnes!
These hats are a lot of fun to wear...
So if your kids love hats then they'll love these!
The patterns are easy to make!
The baby hat is perfect for 1 to 3 months of age!
Your little girl can have a matching doll hat!! 
The goggles and the red sirens are made in a way
that will help them keep their shape!
Boo :-) 
Nedo Nedo Nedo Nedo
The Pattern is Available @ Connie's Spot© Shop or the buy now link below: 

Saturday, June 7, 2014

Cute Little Hush Puppy Security Blanket Free Crochet Pattern©

 Cute Little Hush Puppy Security Blanket!
Perfect for any little guy who needs a hug!
Here's Another Quick and Easy Pattern by Connie Hughes Designs©
Cute Little Hush Puppy Security Blanket Free Crochet Pattern©

This pattern is for the Grey Puppy that goes on top of a security blanket!
Pattern Level Fun and Easy!
This Free Pattern is for Personal use only!
You may sell the products you make from
Cute Little Hush Puppy Security Blanket Free Crochet Pattern©
Do Not Sell, This Pattern is Copyright Protected!
Please Give Connie Hughes Designs© Creative Credit.
Thank You and Happy Crocheting!!
Connie
 
Difficultly Level: Easy

Stitches Used:
Single Crochet, Double Crochet
Decrease Crochet

Materials used in pattern:
Red Heart Yarn Light Grey
Suncatcher Eyes 12mm
Stitch Marker
Poly Fill
With an F Hook
To Make the head: (use a st marker)
Ch2
Row 1. wk 6sc in the 2nd st from the hook.
Row 2. 2sc in each st around-12sts.
Row 3. 1sc in the 1st, 2sc in the next, around-18sts.
Row 4. 1sc in the next 2sts, 2sc in the next st, around-24sts.
Row 5. 1sc in the next 3sts, 2sc in the next, around-30sts.
Row 6. 1sc in 4sts, 2sc in the next st, around-36sts.
Row 7. 1sc in 5sts, 2sc in the next, around-42sts.
Row 8. 1sc in 6sts, 2sc, around-48sts.
Rows 9-15. 1sc in each st around-48sts.
Row 16. 1sc in 6sts, dec1, all the way around-42sts.
Row 17. 1sc in 5sts, dec1, around-36sts.
Row 18. 1sc in 4, dec1, around-30sts.
Row 19. 1sc in 3sts, dec1, around-24sts.
Row 20. 1sc in 2sts, dec1, around-18sts.
Row 21. 1sc in 1st, dec1, around-12sts.

Place the eyes in the 11th or 12th row counting from the top down. With about
5 or 6 sts apart.

Row 22. dec1 2x, wk 2sc in each st-20sts.
Row 23. 1sc in each st, around-20sts.
Row 24. 1sc in 1st, 2sc in the next st-30sts.
Row 25. 1sc in 2sts, 2sc in the next st-40sts.
Row 26. 1sc in each st, around-40sts.
Row 27. wk 2 extra sts evenly around-42sts.
Rows 28-29. 1sc in each st-42sts.
Row 30. 1sc in 5sts, dec1, all the way around-36sts.
Row 31. 1sc in 4sts, dec1-30sts.
Row 32. 1sc in 3sts, dec1, around-24sts.
Row 33.1sc in 2sts, dec1, around-18sts.
Row 34.1sc in 1st, dec1, around-12sts.

Stuff lightly.
Row 35. dec sts until closed and FO.

To make the nose:
Ch2
Row 1. wk 6sc in the 2nd st from the hook.
Row 2. 2sc in each st around-12sts.
Row 3. 1sc in each st-12sts.
Row 4. 1sc in the BLO in each st.
Row 5. 1sc in each st, add 2 extra sts evenly placed-14sts.
Row 6. 1sc in each st around-14sts.
Row 7. 1sc in each st, adding 2 extra sts evenly spaced-16sts.
Row 8. 1sc in each st, adding 2 sts-18sts.
Row 9. 1sc in each st, adding 4 extra sts around evenly spaced-22sts.
Row 10. 1sc in each st, add 2sts evenly-24sts.
Stuff lightly and sew under the eyes.

To make the tip of the nose: (with dark grey yarn)
Ch2
Row 1. wk 5sc in the 2nd st from the hook.
Row 2. wk 2sc in each st around and FO-10sts.


To make the ears: (make 2)
Ch2
Row 1. wk 6sc in the 2nd st from the hook.
Row 2. 2sc in each st around-12sts.
Row 3. 1sc in the 1st, 2sc in the next, around-18sts.
Rows 4-5. 1sc in each st around-18sts.
Row 6. 1sc in 16sts, dec1-17sts.
Row 7. dec1, 1sc in 15sts-16sts.
Row 8. 1sc in 14sts, dec1-15sts.
Row 9. 1sc in 13sts, dec1-14sts.
Rows 10-11. 1sc in each st-14sts.
Row 12. dec1, 1sc in 12sts-13sts.

Row 13. 1sc in each st-13sts.
Row 14. 1sc in 11sts, dec1-12sts.
Row 15. 1sc in 12sts,
Row 16. dec1, 1sc in each st.
Rows 17-18.1sc in each st.
Row 19. dec1 st, 5x and FO.
Sew one on each side of the head.

To make the eye lids: (make 2)
Ch6
1sc in each st and FO-5sts.
With 2 strands of black embroidery floss, sl st across the eye. 

To make the paws: (make 2)
Ch2
Row 1. wk 6sc in the 2nd st from the hook.
Row 2. 2sc in each st around-12sts.
Row 3. 1sc in the 1st, 2sc in the next, around-18sts.
Row 4. 1sc in the BLO around-18sts.
Rows 5-7. 1sc in each st around-18sts.
Row 8. dec1 st 6x, 1sc in 6sts.
Row 9. 1sc in 12sts.
Row 10. 1sc in FLO in 6sts, 1sc in 6-12sts.

Stuff foot area lighty and continue to make the legs and stuff as you go.
Rows 11-20. 1sc in each st around-12sts.

Row 21. To seal pinch both sides together and wk 1sc in 6sts and FO.
Sew on one on each side of body.


To make the collar:
Make a ch big enough to go around the neck.
Row 1. wk 1sc in each st around.
Row 2. wk 3dc in the next 3sts, 2dc in the next st, repeat all the way around.
Row 3. wk 1dc in each st around.
Row 4. with light grey wk 1sl st around entire collar and FO.

The blanket part was done with Red Heart Yarn, color Real Teal.
It was done by just making a big Granny Square.
The trim around the edge:
The 1st row is-3dc in each st around.
The 2nd row is-1dc in each st around, FO.
Thanks For Supporting Connie's Spot© Sponsors!

Knitting Supplies at Craftsy.com
            728x90 banner

< /div>

Martini Pillows Free Crochet Pattern©


"Martini's Are Not Just To Drink"
I love pillows and I really love to make pillows...
The only thing I like more is to keep it simple...and these are just that!
Here's Another Quick & Easy Free Pattern by Connie Hughes Designs©
Martini Pillows Free Crochet Pattern©
Great for a Sun Deck, patio, or Porch!
Pattern Level Easy and Fun!
This is a Free Pattern for personal use.
You may sell the products you make from
Martini Pillows Free Crochet Pattern©
Do not sell, this is pattern Copyright protected.
Please give Connie Hughes Designs© Creative Credit.
Thank You and Happy Crocheting!
Connie
With White Yarn, use an F Hook
To make the small Martini Pillow: (make 2 front & back panels)

Ch21
Wk 1hdc in the 2nd st from the hook and in each st across, ch1 & turn.
Continue until it measures about 12inches across and FO only the 1st panel.
Ch1 and wk 1sc around in each st, put the 2 panels together and wk 1sc around both
pieces stuff and FO.
To make the Bobble st trim: With Spring Green &Turquoise Yarn
With the 2 strands together wk a dc bobble st, but only do 2sts all the way around, 1sc in the next st and FO.
To make the letters, I printed out some block lettering online. Glue them in place with some fabric glue or hot glue.


To make the pillow with the Martini Glass Applique: (With White yarn make 2)
Ch29
Wk 1hdc in the 2nd st from the hook and in each st across, ch1 & turn.
Repeat until measures about 10 to 11inches. Wk this one exactly as you do the 1st one.
To make the trim: Turquoise Yarn and an H Hook
Wk 1backwards crochet st all the way around and FO.
To make the Applique: with Turquoise Yarn an F Hook
Ch2
Row 1. Wk 2sc in st, ch1 & turn.
Row 2. 2sc in 1st st, 2sc in the next, ch1 & turn.
Row 3. 1sc in 4sts, ch1 & turn.
Row 4. 2sc, 1sc in 2sts, 2sc in the next, ch1 & turn.
Row 5. 1sc in 6sts, ch1 & turn.
Row 6. 2sc, 1sc in 4sts, 2sc, ch1 & turn.
Row 7. 1sc in 8sts, ch1 & turn.
Row 8. 2sc, 1sc in 6sts, 2sc, ch1 & turn.
Row 9. 1sc in 10sts and FO.
To make the stem: use a smaller Hook like D or an E
Ch3
Wk 2dc bobble sts in the last ch st, wk 1sl st in the same st.
Ch3 and repeat until the stem measures about 3inches.
To make the bottom piece: with an F Hook:
Ch13
Wk 1sc in each st, ch1 & turn.
Dec1, 1sc in 8sts, dec1 and FO. Sew it in place under the stem.
I sewed on a small charm to make it look like a glass marker.

To make the big pillow: With Spring Geen an F Hook (make 2 panels)
Make a Ch as long as you would like your pillow to be. Mine is about 12inches.
Wk 1hdc in the 2nd st from the hook, and in each st across.
Repeat until you have about 24 to 25 rows. Join the panels the same way you did the
other 2 pillows.
To make the ruffle: with a I Hook and Turquoise Yarn
Wk 3dc in each st all the way around. Change  to Spring Green Yarn.
Wk 1dc in each st around, and change back to Turquoise and wk 1dc in each st around and FO.


Thanks For Supporting Connie's Spot© Sponsors!

Knitting Supplies at Craftsy.com
            728x90 banner

< /div>

Wednesday, June 4, 2014

Crochet Agnes & Edith Inspired Hats

Agnes &  Edith Hats
I made this hat for my little Gwinna!
I do believe Agnes approves!
And I had to make big sister's hat too!
The Agnes hat is 3 to 6 months...and sister's hat is toddler!
Look for My Free Agnes Crochet Doll (pictured here) Pattern at the link below:
http://spotconnie.blogspot.com/2014/05/free-crochet-agnes-inspired-doll-pattern.html

Thanks For Supporting Connie's Spot© Sponsors!

Knitting Supplies at Craftsy.com
            728x90 banner

< /div>

Make Sure You Check This Out!! Connie's Spot© Blog Post Archive 300+ Posts Loaded With Gems!!!