Welcome to Connie's Spot

The Above Picture is some of Connie's Spot© Crochet Patterns© All Patterns are Available at my Shop on ETSY Welcome to the Multiple Award-Winning Connie's Spot© & Connie Hughes Designs© Crocheting Blog! Check out Connie's New Endeavor Paper Crafting-Journals!! Now in our 11th Year We Want to Thank All Our Customers/Friends Who Have Helped Us Grow with Thousands of Pattern Sales/Downloads, and Over "ONE MILLION PAGE VIEWS" from All Over the World!!!

If you are new to Connie's Spot© make sure to take the time to follow Connie's Spot© Her Patterns are available at her shop on Etsy. Check out Connie's Spot© Blog Archive of 300+Posts!! That includes Free Crochet Patterns from Connie Hughes Designs© Free Recipes, New Paper Crafting-Journals, Decorating Tips, & Poetry!

As always Connie's Spot© is free of Pop-Ups and Invasive Ads...so take your time and explore her blog post archives its loaded with gems...most of all enjoy! Connie's Spot© will receive a small commission if you make a purchase after clicking on the Advertiser/Sponsor Links. This helps cover the cost for providing free patterns! Thanks for Visiting Connie's Spot© Blog!!

Connie's Spot© Crocheting & Connie Hughes Designs© Characters, Photo's, Designs & Patterns are All Copyright© Protected All Rights Reserved.

Shop Connies Spot© and Connie Hughes Designs© Crochet Patterns & Handmade Journals on Etsy!!

Shop Connies Spot© and Connie Hughes Designs© Crochet Patterns & Handmade Journals on Etsy!!
Shop Connie's Spot© and Connie Hughes Designs© Crochet Patterns & Handcrafted Journals on Etsy!! 995 Sales of Finished Products & Patterns Plus Over 100 5-Star Reviews!! To All Our Customers Thank You!!! Just Click on the Picture above to take you to my shop on Etsy!

Now Over ONE MILLION PAGE VIEWS!! To All Our Friends, Followers Customers & Visitors Welcome!!

Connie's Spot© Language Translator

"Ladies & Gentlemen Journal" Handcrafted by Connie Hughes Now available on my Etsy Shop!

"Ladies & Gentlemen Journal" Handcrafted by Connie Hughes Now available on my Etsy Shop!
"Ladies & Gentlemen Journal" Handcrafted by Connie Hughes, I have to say this is one of my favorites for sure. I really love this one, because it's a great size. Big enough to write on and small enough to carry inside a bag and take it with you. Now available on my Etsy Shop!

Connie's Spot© Awarded the Feed Spot Top 100 Crochet Blog Award!!

Connie's Spot© Awarded the Feed Spot Top 100 Crochet Blog Award!!
Connie's Spot© Awarded the Feed Spot Top 100 Crochet Blog Award!! I would like to personally congratulate you as your blog Connie's Spot© has been selected by our panelist as one of the Top 100 Crochet Blogs on the Web!!

Connie's Spot© Awarded Top 80 Crochet Blog Award!!

Connie's Spot© Awarded Top 80 Crochet Blog Award!!
"Top 80 Crochet Blogs" By AmsterdamDiary.com: Originality★★★★ Design★★★★★ Social Media★★★★★

Connie's Spot©

Connie's Spot©
Recipient of the One Lovely Blog Award...Thank You Crochet is the Way!!

Saturday, January 23, 2016

My New Crochet Poncho's

"Here's My New Crochet Poncho's"
By Connie Hughes Designs©
I just want to share my new poncho's with you...
I've been working on these off and on for awhile now...
I  never made anything like it before...
I made the Ivory colored one first as a trial...not quite sure
how it would turn out and if I would even like it...
When I was done I decided that I liked it...
So I made one in Dusty Rose...
But then I realized I really didn't have that much to
wear with that color...so I made one in black! :-)

It's so easy to throw on with jeans and go!
 I just added this small break to add some interest...
really love the black one...it's so very comfortable to wear!

I didn't make a pattern for these since I was really just experimenting.
But I wanted to share them with you...what do think?


Connie’s Spot©
Connie Hughes Designs©
Connie Hughes Owner/Designer
Characters, Photos, Patterns & Designs 
Are Copyright Protected All Rights Reserved.

Thanks for Supporting Connie's Spot© Sponsors!!

Thursday, January 14, 2016

Free Retro Robot & Pony Hat Patterns©

"Free Retro Robot & Pony Hat Patterns©"
By Connie Hughes Designs©
Here are two more hat patterns...with the cold and wet weather we've been 
having here it just makes you want to curl up and make a hat...and I
just love making things for kids...so here's a
Toddler size Robot Hat and a Child size Pony Hat! 
The Robot Hat can be for a boy or girl...the Pony Hat is perfect
if you have a My Little Pony fan, if so they'll love this hat! 


Both hats are easy to make and fun for the kids to wear! 
 I really enjoyed making the Pony Hat...I remember buying these
for my girls when they were little...I guess a good toy
never goes out of style!
 
I chose to make the rainbow colored pony because
of the of mane, it is so pretty!
I made 5 rows...the mane takes a while to make...so
I put on a movie and by the time
the it was over I was done...well I had 3 done!
This 1950's Toy Robot was my inspiration for the Retro
Robot Hat Below...I did change the color of the nose to white
because you just couldn't see it with the red...I personally
love the old classic toys...they were made to last...these
robots were heavy and made out of metal, although they were
probably painted with lead paint...but the quality and durablity
of these toys were outstanding!
The pattern for each hat is down below the Pony's in Blue and the Robots in Red!
I hope you enjoy making them...it's the perfect time to add some new
hats to the kids wardrobe!


Pony Hat is Child Size
Yarn used for the Hat:
 1 Skein of I Love This Yarn in Turquoise (Hobby Lobby)
Red Heart Yarns used to make the Mane/Eyes in:
Glowworm Green
White
Black
Yellow
Purple
Blue
Red
Hooks used in Pattern:
J 6.0mm, G 4.0mm, E 3.5mm
Other Materials used in Pattern:
Sewing Needle & Thread
Hot Glue (to attach the small white dots to eyes)
Abbreivations used in both Patterns:
sc-single crochet
st-stitch
sts-stitches
wk-work
ch-chain
hdc-half double crochet
dc-double crochet
rsc-reverse singel crochet
BLO-back loops only
FLO-front loops only
dec-decrease
FO-fasten off

To make Pony Hat: with Turquoise Yarn & J Hook
Ch2
Row 1. 9hdc in the 2nd st from the hook.
Row 2. 2hdc in each st around-18sts.
Row 3. 1hdc in 1, 2hdc in the next st-27sts.
Row 4. 1hdc in 2, 2hdc in the next st-36sts.
Row 5. 1hdc in 3, 2hdc in the next st-45sts.
Row 6. 1hdc in 4, 2hdc in the next st-54sts.
Row 7. 1hdc in 5, 2hdc in the next st-63sts.
Row 8. 1hdc in each st around.
Repeat until hat measures 7.5inches, when the hat measurements are reached wk 2 or 3sc sts, and then make the ear flaps below.
To make the Ear Flaps:
Row 1. 1sc in 12sts, ch1 & turn.
Row 2. dec1sc, 1sc in 8, dec1sc, ch1 & turn.
Row 3. 1sc in 10sts, ch1 & turn.
Row 4. dec1sc, 1sc in 6, dec1sc, ch1 & turn.
Row 5. 1sc in 8sts, ch1 & turn.
Row 6. dec1sc, 1sc in 4, dec1sc, ch1 & turn.
Row 7. 1sc in 6sts, ch1 & turn.
Row 8. dec1sc, 1sc in 2, dec1sc, ch1 & turn.
Row 9. 1sc in 4sts, ch1 & turn.
Row 10. dec1sc, dec1sc, ch1 & turn.
Row 11. 1sc in 2, ch1 & turn.
Row 12. dec1sc and FO.
To make the 2nd Ear: Leave 20 to 21sts in the front unworked, attach yarn and make the 2nd ear flap, repeating rows 1-12 and FO. Attach Blue Yarn with a slst and ch1, wk 1sc all the way around the hat and FO.

To make the Ears on top of the hat: with Turquoise Yarn & G Hook (make 2)
Ch2
Row 1. 6sc in the 2nd st from the hook.
Row 2. 2sc in each st-12sts.
Row 3. 1sc in 1, 2sc in the next st-18sts.
Row 4. 1sc in 18sts
Rows 5-10. repeat row 4
Add 2sts
Row 11. 1sc in 20sts
Row 12. 1sc in 20sts
Add 2sts
Row 13. 1sc In 22sts
Row 14. 1sc in 22sts and FO.

To make the White Eyes: with White Yarn & G Hook (make 2)
Ch2
Row 1. wk 8hdc in 2nd st from the hook.
Row 2. 2hdc in each st around-18sts.
Row 3. 1hdc in 2, 2hdc in the next st-24sts.
Row 4. 1sc, 1hdc, 1dc, 2dc, 1dc, 2dc, 1dc, 2dc, 1dc, 1hdc, 1sc, 1slst and FO.

Attach black yarn to the top of the white eye (like in the photo below).
Black Yarn & E Hook with a slst
Ch1, wk 1slst in the BLO in 12sts along the top part of each eye and FO. (Don't worry it the eye curls a little bit).
Sew the white part of the eyes onto the hat after you sew on the purple eyes.

To make the Pupil: with Black Yarn & G Hook
Ch2
Row 1. 6sc in the 2nd st from the hook.
Row 2. 2sc in each st-12sts.
Attach Purple Yarn with a slst & ch2
Row 1. wk 1hdc in 1st, 2hdc in the next st around and FO.
With a small piece of white felt cut-out 2 small circles and 2 tiny circles and hot glue them into place.


To make the Mane: with Yellow, Purple, Red, Blue and Glowworm Green & J Hook (make 1 in each color for a total of 5).


Ch between 70 or 75 (or how ever long you want)
Row 1. wk 1sc in each st across, ch3 & turn.
Row 2. wk 3dc in each st across, ch3 & turn. (I worked a few sts with 2dc in them so it wouldn't be as curly).
Row 3. wk 1dc in each st across, ch3 & turn.
Row 4. 1dc in each st across and FO.

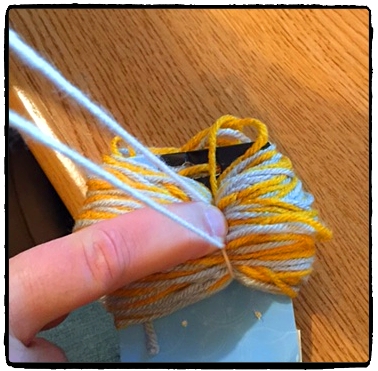
To sew the mane on: Sew the first one on in the middle of the hat like in the 1st photo below. About 6" from the front of the hat up.  Leaving 2 ½ to 3" in the front of each mane loose, for a more natural look. Then sew 2 manes on each side of the centered one.


To finish hat make the Braids.


Retro Robot Hat

Robot Hat is Toddler Size
Yarn used for the Hat:
1 Skein of I Love This Yarn in Red (Hobby Lobby)
Small Amount of Turquoise (for the eyes)
Red Heart Yarns used in Pattern:
White
Yellow
Grey

Hooks used in Pattern:
J 6.0mm, G/F 4.0mm/3.75mm, C/D 2.75mm/3,25mm

Other Materials used in Pattern:
Sewing Needle & Thread
Poly Fiber Fill To make the Toddler Robot Hat: with Red Yarn & J Hook
Repeat rows 1-8 of the Pony Hat, repeat row 8 until the hat measures 7inches, make the 1st ear flap.
To make the Ear Flaps:
Row 1. wk 1hdc in 10sts, ch2 & turn.
Row 2. dec1hdc, 1hdc in 6sts, dec1hdc, ch2 & turn.
Row 3. 1hdc in 8sts, ch2 & turn.
Row 4. dec1hdc, 1hdc in 4, dec1hdc, ch2 & turn.
Row 5. 1hdc in 6sts, ch2 & turn.
Row 6. dec1hdc, 1hdc in 2, dec1hdc, ch2 & turn.
Row 7. 1hdc in 4sts, ch2 & turn.
Row 8. dec1hdc, dec1hdc, ch2 & turn.
Row 9. dec1hdc and FO.
Skip 21sts in the front of the hat and make the 2nd ear flap, repeat rows 1-9.

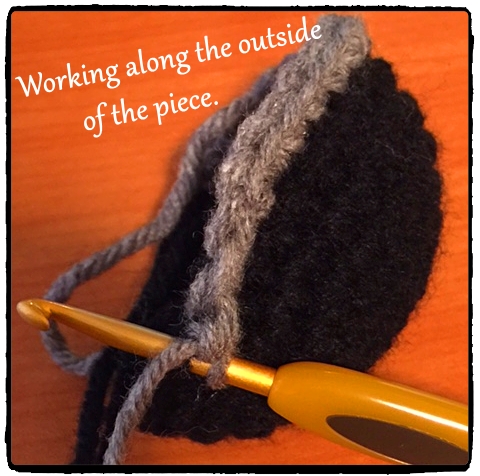
To make the Grey Trim around the hat: with Grey Yarn & G Hook
(Working a reverse single crochet will make it look like a coil).
Attach yarn with a slst, ch1, wk 1rsc all the way around and FO.

To make the Yellow piece on top of the hat: with Yellow & G Hook
Ch2
Row 1. 6sc in the 2nd st from the hook.
Row 2. 2sc in each st-12sts.
Row 3. 1sc, 2sc in the next st-18sts.
Row 4. 1sc in the FLO in 18sts.
Row 5. 1sc in 18sts
Row 6. 1sc in 2, 2sc in the next st-24sts.
Row 7. 1sc in 24sts
Rows 8-9. repeat row 7
Attach grey yarn to the outside with a slst, ch1
Row 10. 1sc in 3, 2sc in the next, join & ch1.
Row 11. 1sc in the FLO, join and FO.
Stuff and sew to the top of the hat.
There are no stiff pieces on this hat...
the Antenna's are soft and bendable!
To make the Mouth: with White Yarn & G Hook
Ch26
Row 1. wk 1sc in each st across, change to grey yarn, ch1 & turn.
Row 2. 1sc in each st across, change to white yarn, ch1 & turn.
Row 3. 1sc in each st across and FO.

To make the Nose: with White Yarn & D Hook (make 2)
Ch2
Row 1. 2sc in the 2nd st from the hook, ch1 & turn.
Row 2. 2sc, 2sc, ch1 & turn.
Row 3. 1sc in 4sts, ch1 & turn.
Row 4. 2sc, 1sc in 2, 2sc, ch1 & turn.
Row 5. 1sc in 6sts, ch1 wk 1sc around 2 sides and FO.
Crochet the 2 noses together, wk 1sc around the bottom and one side leaving one side opened. Stuff the nose lightly and sew on to the hat.

To make the Eyes: with Yellow Yarn & G or F Hook (make 2)
Ch2
Row 1. wk 6sc in the 2nd st from the hook.
Change to Turquoise Yarn
Row 2. 2sc in each st around-12sts.
Change to White Yarn
Row 3. 1sc in 1, 2sc in the next st-18sts.
Row 4. 1sc in 2, 2sc in the next st and FO-24sts.

To make the Grey Side Pieces: with Light Grey Yarn & G or F Hook (make 2 of each)


Ch2
Row 1. 6sc in the 2nd st from the hook.
Row 2. 2sc in each st-12sts.
Row 3. 1sc, 2sc in the next st-18sts.
Row 4. 1sc in 2, 2sc in the next st-24sts.
Row 5. 1sc 3, 2sc in the next st-30sts.
Row 6. 1sc in the FLO in each st-30sts
The Middle Piece:
Repeat rows 1-4, then repeat row 6
The Small Piece:
Repeat rows 1-3, then repeat row 6
Sew the 3 pieces one on top of the other and then sew on to each side of the hat.

To make the Grey Antenna: with Light Grey Yarn & C or D Hook (make 2)


Ch26
wk 1slst in each st and FO.

To make the Little Red Antenna Ball: with Red Yarn & D Hook (make 2)
Ch2
Row 1. 5sc in the 2nd st from the hook.
Row 2. 2sc in each st around-10sts.
Row 3. 1sc in 10sts
Row 4. 1sc, dec1sc around.
Row 5. dec1sc and FO.
Push the grey antenna piece inside the ball opening and sew in place.

To make the Pom-Poms see link below

http://spotconnie.blogspot.com/2016/01/free-bb-robot-inspired-crochet-hat.html

Connie’s Spot© & Connie Hughes Designs© 
Connie Hughes Owner/Designer 
The Free 12th Man Game Day Crochet Hat Pattern© is for personal use. 
Characters, Photos, Patterns & Designs 
Are Copyright Protected All Rights Reserved.
Happy Crocheting!! 
Connie

Here are a Few More of Connie Spot© Patterns Available!

Henry Hugglemonster Inspired Crochet Hats Pattern©Henry Hugglemonster Inspired Hats Pattern© By Connie Hughes Designs©

These hats are all toddler sizes and the little baby one is 3 to 6 months!
One pattern makes all 6 of these hats!!
All for Only $2.49 Instant Digital Download: 1 PDF included


Zoe Girl© and Jelly Bean Bunny© Crochet Doll Pattern©
Meet Zoe Girl© & Her Bunny Buddy Jelly Bean© By Connie Hughes Designs©

Pattern makes both of these cute dolls and has step by step instructions with lots of pictures! They are both 27" tall...and Jelly Bean© is 30" tall with her ears All for Only $2.99 Instant Digital Download: 1 PDF included


Blossom & Blue Bunny Crochet Dolls Pattern©
Meet Blossom and her Buddy Blue "He's the Fastest Carrot in the West" Blossom & Blue Bunny’s with Style! Includes clothing & they are 18 & 20" Tall.
All for Only $2.99 Instant Digital Download: 1 PDF included

Friday, January 8, 2016

Free 12th Man Game Day Crochet Hat Pattern©

"Free 12th Man Game Day Crochet Hat Pattern©"
By Connie Hughes Designs©


Go Hawks!! 
Fun & Easy Game Day Hat!
Just Change the Color for Your Team!! 

Red Heart Yarns used in Pattern:
Glowworm Green
Royal Blue
Small strand of white (for football)

Hooks used in Pattern:
J 6.0mm
G 4.0mm
D 3.25mm

Other Materials
Stich Marker
Tapestry Needle
Sewing Needle & Thread

To make the Hat: with Royal Blue & J Hook
Ch2
Row 1. 9hdc in the 2nd st from the hook.


Change to Glowworm Green
Row 2. wk the first hdc in the BLO then wk the next hdc under both loops, 2hdc in each st around-18sts.


Change to Royal Blue
Row 3. 1hdc in 1, 2hdc in the next st-27sts.
Change to Glowworm Green
Row 4. 1hdc in 2, 2hdc in the next st-36sts.

Change to Royal Blue
Row 5. 1hdc in 3, 2hdc in the next st-45sts.
Change to Glowworm Green
Row 6. 1hdc in 4, 2hdc in the next st-54sts. (Stop at 54sts for child size & go to row 8)
Change to Royal Blue
Row 7. 1hdc in 5, 2hdc in the next st-63sts. (Stop at 63sts for teen/adult, go to row 8)
Here you can change to a contrasting color.
Row 8. 1hdc in each st around
Once the color changing is done, I use a stitch marker.
For child hat: repeat until hat measures 7.5inches, wk 2 or 3sc sts and FO.
For teen to adult hat: repeat row 8 until hat measures 8inches, wk 2 or 3sc sts and FO.

To make the Ear Flaps: with Glowworm Green or Royal Blue & J Hook
When the hat measurements are reached FO. Attach contrasting yarn with a sl st and ch1.
Row 1. 1sc in 12sts, ch1 & turn.
Row 2. dec1sc, 1sc in 8, dec1sc, ch1 & turn.
Row 3. 1sc in 10sts, ch1 & turn.
Row 4. dec1sc, 1sc in 6, dec1sc, ch1 & turn.
Row 5. 1sc in 8sts, ch1 & turn.
Row 6. dec1sc, 1sc in 4, dec1sc, ch1 & turn.
Row 7. 1sc in 6sts, ch1 & turn.
Row 8. dec1sc, 1sc in 2, dec1sc, ch1 & turn.
Row 9. 1sc in 4sts, ch1 & turn.
Row 10. dec1sc, dec1sc, ch1 & turn.
Row 11. 1sc in 2, ch1 & turn.
Row 12. dec1sc and FO.
To make child hat leave 21sts in the front unworked, attach yarn and make the 2nd ear flap, repeating rows 1-12 and FO.
On teen & adult hat leave 23sts in the front unworked, attach yarn and make the 2nd ear flap repeating rows 1-12 and FO.


Attach contrasting yarn to the st next to the beginning ear flap, ch1, wk 1sc in each st around entire ear lap and FO.
Repeat on the other side.

Attach contrasting color and wk 1sc all the way around the hat, when you get to the tip  of each ear flap ch26, wl 1sl st in 25sts, continue working 1sc until you reach the other ear and repeat.

To make the Football: with Brown Yarn & D Hook


Ch2
Row 1. 2sc in the 2nd st from the hook, ch1 & turn.
Row 2. 2sc, 2sc, ch1 & turn.
Row 3. 1sc in 4sts, ch1 & turn.
Row 4. 2sc, 1sc in 2, 2sc, ch1 & turn.
Row 5. 1sc in 6sts, ch1 & turn.
Row 6. 2sc, 1sc in 4, 2sc, ch1 & turn.
Row 7. 1sc in 8sts, ch1 & turn.
Row 8. 2sc in 2, 1sc in 4, 2sc in 2, ch1 & turn.
Rows 9-10. 1sc in 12sts, ch1 & turn.
Row 11. dec1sc 2x, 1sc in 4, dec1sc 2x, ch1 & turn.
Row 12. 1sc in 8sts, ch1 & turn.
Row 13. dec1sc, 1sc in 4, dec1sc, ch1 & turn.
Row 14. 1sc in 6sts, ch1 & turn.
Row 15. dec1sc, 1sc in 2sts, dec1sc, ch1 & turn.
Row 16. 1sc in 4sts, ch1 & turn.
Row 17. dec1sc, dec1sc, ch1 & turn.
Row 18. dec1sc and FO.
Sew football applique to one side of hat.


To make the #1: with Glowworm Green & G Hook
Ch16
Wk 1dc in the next 14sts and FO.

To make the #2: with Glowworm Green & G Hook
Ch30
Row 1. 1dc in 7sts, dc the next 7sts tog., 1dc in 3, 2dc in 2sts, 1dc in 2, 2dc in 2, 1dc in 2, 2dc in the next 3sts and FO.

To make the Pom-Poms see the link below:
http://spotconnie.blogspot.com/2016/01/free-bb-robot-inspired-crochet-hat.html
I used Royal Blue, Glowworm Green and Blue Yarns/wrapping the 3 strands together 100x.

Connie’s Spot© & Connie Hughes Designs© 
Connie Hughes Owner/Designer 
The Free 12th Man Game Day Crochet Hat Pattern© is for personal use. 
Characters, Photos, Patterns & Designs 
Are Copyright Protected All Rights Reserved.
Happy Crocheting!! 
Connie


Here are a Few More Popular Connie Spot© Hat Patterns Available!
The Viking Helmet Hat Pattern© Inspired by Skyrim 
 By Connie Hughes Designs©
This pattern is easy to follow and really fun to make...perfect for Halloween! This hat is for teen to adult! If you've got a gamer in the house who love's his video games...he'll love this hat! Only $1.99 Instant Digital Download: 1 PDF included


Bane Inspired Crochet Hat Pattern©
By Connie Hughes Designs©

I have had so many people ask me if I had a pattern for this hat...
So I finally took the time and wrote one! Here's The Bain Inspired Hat & Mask!!
Only $1.75 Instant Digital Download: 1 PDF included

The Minion Purple Monster Inspired Hat Pattern©
With Removable Goggles© By Connie Hughes Designs©The Minion Purple Monster Inspired Hat Pattern© With Removable Goggles© By Connie Hughes Designs©
Designed so it can be made in different sizes: Baby-Toddler-Child to Adult
Only $1.75 Instant Digital Download: 1 PDF included
Thanks for Supporting Connie's Spot©!!


Friday, January 1, 2016

Free BB Robot Inspired Crochet Hat Pattern©

 Free BB Robot Inspired Crochet Hat Pattern©
By Connie Hughes Designs©
Happy New Year...hard to believe it's 2016 already!
Here's my first pattern for the new year...it's free and super easy to make!
If your kids love those space movies then they'll love this hat!!
This Childs hat is really easy, I made this one in a day...
Perfect if you have several kids to make it for!


Yarns Used in Pattern:
I Love This Yarn in White (available at Hobby Lobby)
Light Grey
Dark Grey
Black
Gold
Optional:
White Piece of Felt (for the lens)

Other Materials Used in Pattern:
Poly Fiber Fill for the lens
Sewing Needle & Thread
Stitch Marker
Tapestry Needle

Hooks Used in Pattern:
J 6.0mm
G 4.0mm

To make the Hat: with White Yarn & J Hook
Ch3
Row 1. wk 9hdc in the 3rd ch from the hook, join and ch2.
Row 2. wk 2hdc in each st, join & ch2-18sts.
Row 3. 1hdc in 1, 2hdc in the next st, join & ch2-27sts.
Row 4. 1hdc in 2, 2hdc in the next st, join & ch2-36sts.
Row 5. 1hdc in 3, 2hdc in the next st, join & ch2-45sts.  
Change to Light Grey Yarn
Row 6. 1hdc in 4, 2hdc in the next st, join & ch2-54sts.
Row 7. 1hdc in 5, 2hdc in the next st, join & ch2-63sts.
Change to White Yarn
Row 8. wk 1hdc in each st around, join & ch2-63sts.
Row 9. repeat row 8
Change to Gold Yarn
Row 10. repeat 1hdc in each st around, join & ch2-63sts. (This is the last row I joined, I used a st marker to finish off the hat).
Rows 11-16. repeat row 10 until hat measures 7 1/2" long.
When the hat is at the desired length, attach gold yarn and wk 1sc in each st around and FO.
(When doing color changes...sometimes it shows, so that's why I FO).

To make the Ear Flaps: Gold or White Yarn & J Hook
Row 1. Attach yarn on one side of the hat, wk 1sc in 12sts, ch1 & turn.
Row 2. dec1sc, 1sc in 8sts, dec1sc, ch1 & turn.
Row 3. 1sc in 10sts, ch1 & turn.
Row 4. dec1sc, 1sc in 6, dec1sc, ch1 & turn.
Row 5. 1sc in 8sts, ch1 & turn.
Row 6. dec1sc, 1sc in 4, dec1sc, ch1 & turn.
Row 7. 1sc in 6sts, ch1 & turn.
Row 8. dec1sc, 1sc in 2, dec1sc, ch1 & turn.
Row 9. dec1sc, dec1sc, ch1 & turn.
Row 10. dec1sc and FO.
Skip about 18 or 19sts in the front of the hat and make the 2nd ear flap...repeating rows 1-10.
Wk 1sc around each ear flap with alternating color and FO.

To make the strands for the Pom-Poms to attach to: with Gold & White Yarn
Attach yarn to the bottom of each ear flap with a sl st, ch28, wk 1sl st in 28sts and FO.

To make the Pom-Poms: with Light Grey, White and Gold Yarn
With a piece of card board about 2 1/2 " to 3" wide, lay a long piece of yarn across it and then wrap 2 strands of yarn around the card board and that piece of yarn about 100x.

Tie the long piece of yarn around the wrapped yarn with a knot.
 Cut the yarn and tie again several times to secure.
 Trim the yarn short to make a ball, use the long piece of yarn to attach pom-pom to the strand that is attached to the ear flaps.


To make the Big Lens: with Black Yarn & G Hook
Ch2
Row 1. wk 6sc in the 2nd st from the hook.
Row 2. 2sc in each st around-12sts.
Row 3. 1sc, 2sc in the next st-18sts.
Row 4. 1sc in 2, 2sc in the next st-24sts.
Row 5. 1sc in 3, 2sc in the next st-30sts.
Row 6. 1sc in 30sts
Row 7. 1sc in 3, dec1sc, around-24sts.
Change to Dark Grey Yarn
Row 8. wk 1sc in 3, 2sc in the next st in the FLO, join and ch2-30sts.
Row 9. 1hdc in each st around, join & ch2-30sts.
Row 10. 1hdc in 4, 2hdc in the next st, join and FO.
Lightly Stuff the inside of the lens and sew to the front of the hat.
To make the Small Lens: with Black Yarn
Repeat rows 1-3
Row 4. wk 1sc in the FLO in each st around and FO.
Stuff lightly and sew in place next to the other one, leaving a slight space between them.

This Completes the Free BB Robot Inspired Crochet Hat Pattern©
Connie’s Spot© & Connie Hughes Designs© 
Connie Hughes Owner/Designer 
The Free BB Robot Inspired Crochet Hat Pattern© is for personal use. 
Characters, Photos, Patterns & Designs 
Are Copyright Protected All Rights Reserved.
Happy Crocheting!! 
Connie

Here are a Few More of Connie Spot© Hat Patterns Available!
Skyrim Inspired Viking Helmet Hat Pattern©
The Pattern is Only $1.99 at Connie's Spot© Shop at the Link Below:

Bane Inspired Crochet Hat Pattern©

The Pattern is Only $1.50 at Connie's Spot© Shop at the Link Below:

Minion Purple Monster Inspired Hat and Goggles Pattern©
The Pattern is Only $1.50 at Connie's Spot© Shop at the Link Below:
Thanks for Supporting Connie's Spot© Sponsors!!

Make Sure You Check This Out!! Connie's Spot© Blog Post Archive 300+ Posts Loaded With Gems!!!